2023.01.17
“Let’s have fun with VOCALOID!” vol.6 -Adjusting effects and export audio-
Thank you very much for reading "Let's have fun with VOCALOID!”
This is the sixth and final article in this series. We will edit the data that we made by the fifth episode, and finish the project, combining instrumental music with a VOCALOID.
Any form is okay, but the important thing is to try to finish. Let’s do our best to finish this project!
You can download VOCALOID6 Free Trial Version!
Please check an article which includes explanation for Installation and Authorization of VOCALOID6 free trial version.
You can download VOCALOID Editor file(vpr format) that completed to enter the data based on this article. Click the button below.
Adjusting breaths
People breath when they sing, and we call this, “breath” in VOCALOID. VOCALOID is set up to automatically add breaths like a person. The singing data we have made so far has breaths that were added automatically.
Let’s learn how to adjust breaths.
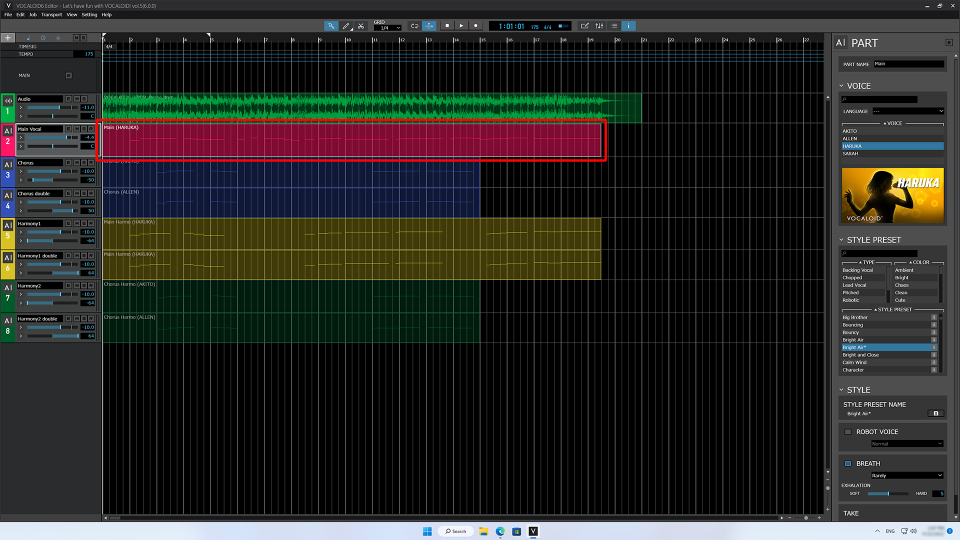
Let’s solo the main vocal track to make the breaths easier to hear. Click the S button on the track to solo it. When soloed, only tracks that have the S lit are output.
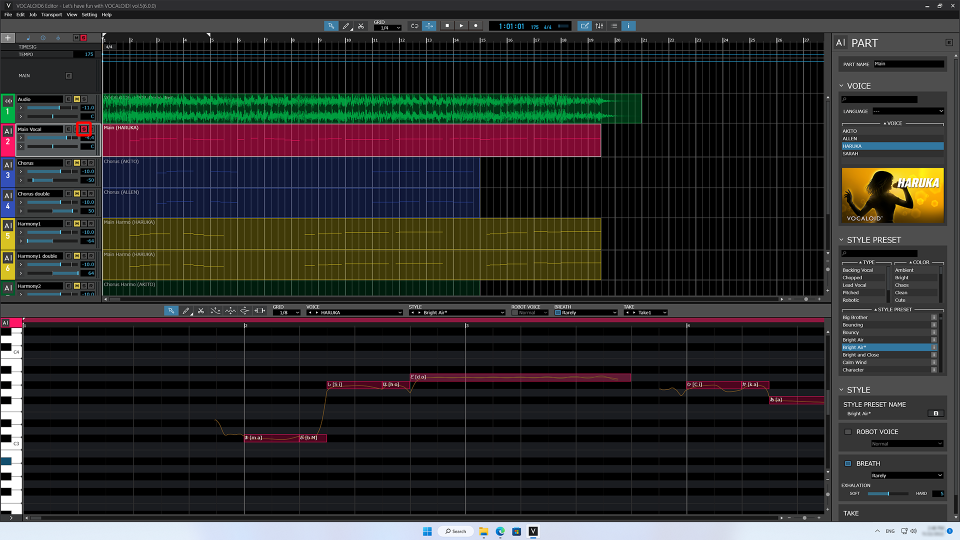
The BREATH setting is at the top of the MUSICAL EDITOR. BREATH can be used to adjust the frequency of breaths.
Let’s choose “Often” from the options. Then, let’s play it. Listen to when breaths occur.
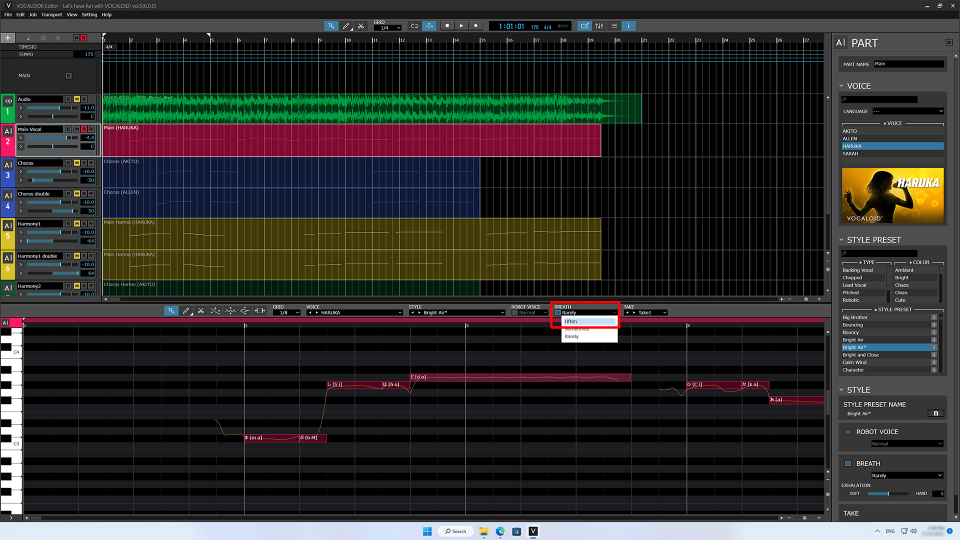
The “Often” setting adds breaths most frequently. Breaths can now be heard where they were not with the default “Rarely” setting.
Let’s make more adjustments to the breaths.
Open the Inspector and look at the BREATH section near the bottom.
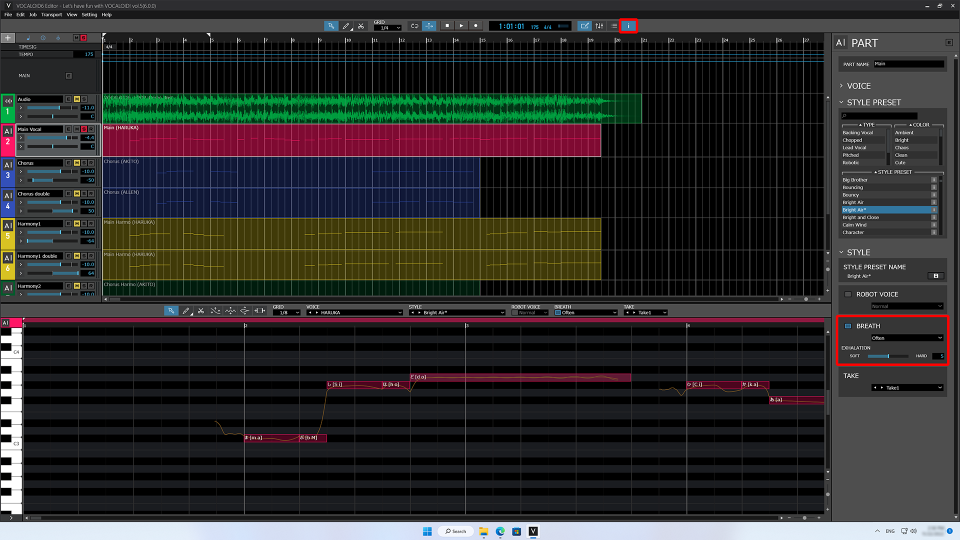
The EXHALATION slider can be used to adjust how loud the breaths are. Let’s set it to 10. After changing it, let’s play it. Pay attention to the change in breath volume.
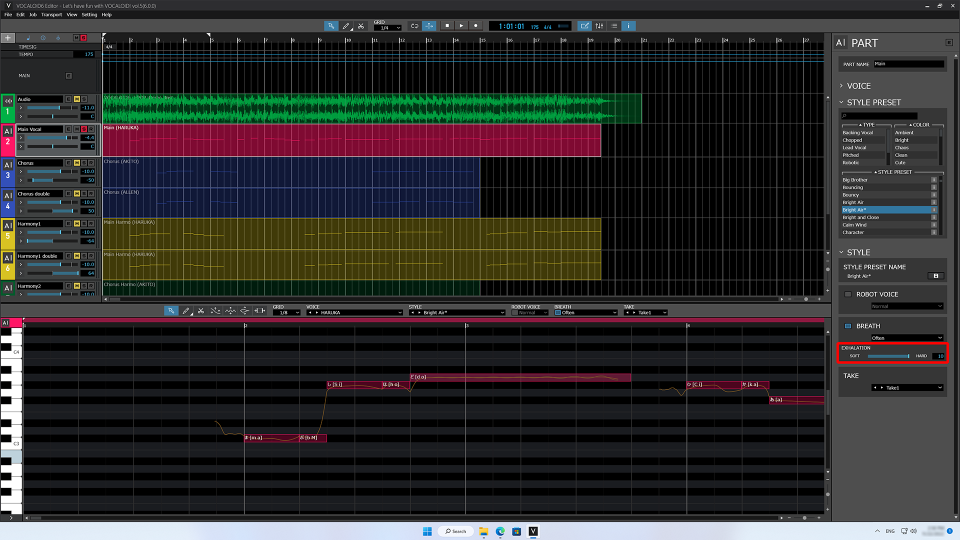
The breath volume has become louder. Since 10 is pretty loud, set it to about 6.
Changing settings for each part
The breath setting is used for all of the selected part. To use different breath settings, for example, to separate verse A and the chorus, the Scissors tool can be used to split parts. Parts must be split to use different breath settings in the middle of a song.
Let’s select the Scissors tool and split the main vocal part at the beginning of the 10th bar.

We will reactivate the Arrow tool and select the first half of the split part. Then, we will set BREATH to Sometimes. Then, let’s play it.
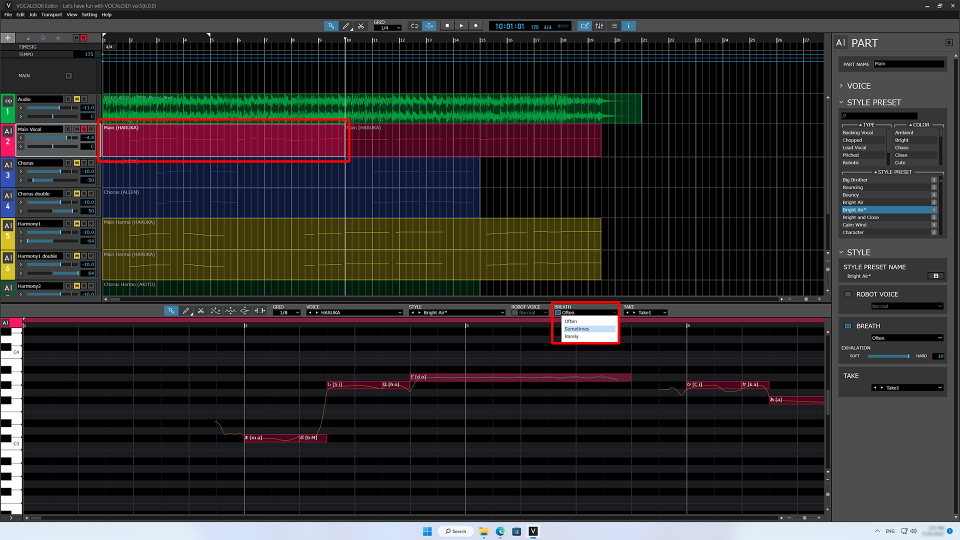
We were able to make breath settings different according to the part. Using part division and breath settings, refine the vocal sound as you like.
Adjusting effects
As our final task before completion, let's adjust the volume of the echoes for each track.
A function that adjusts or changes sound quality by, for example, adding echoes through reverb or delay is called an effect.
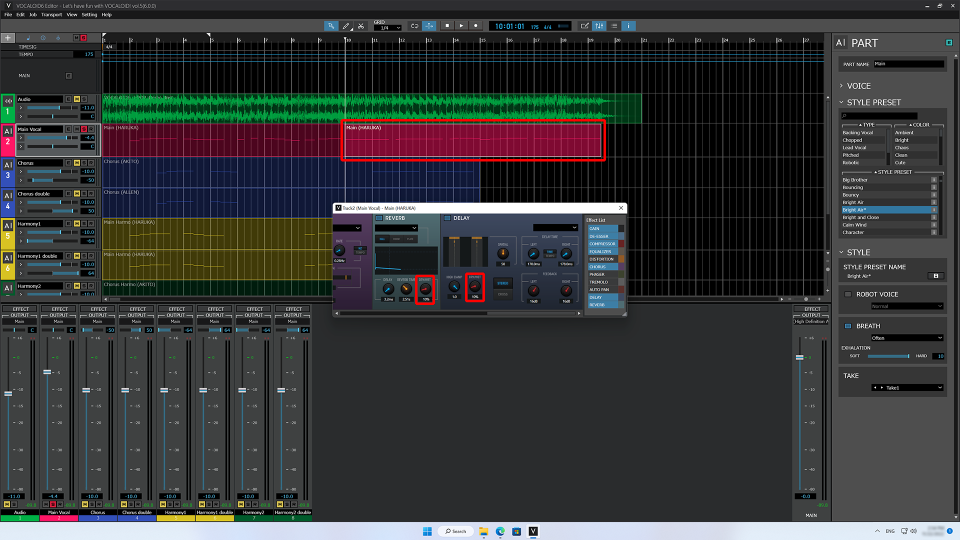
We are using a style preset called “Bright Air” for this data. Style presets contain effect settings that adjust the sound quality. Style presets are applied to parts individually, so changes to effect settings must be made for each part. When a part is selected, press the E (effect) button in the Inspector.
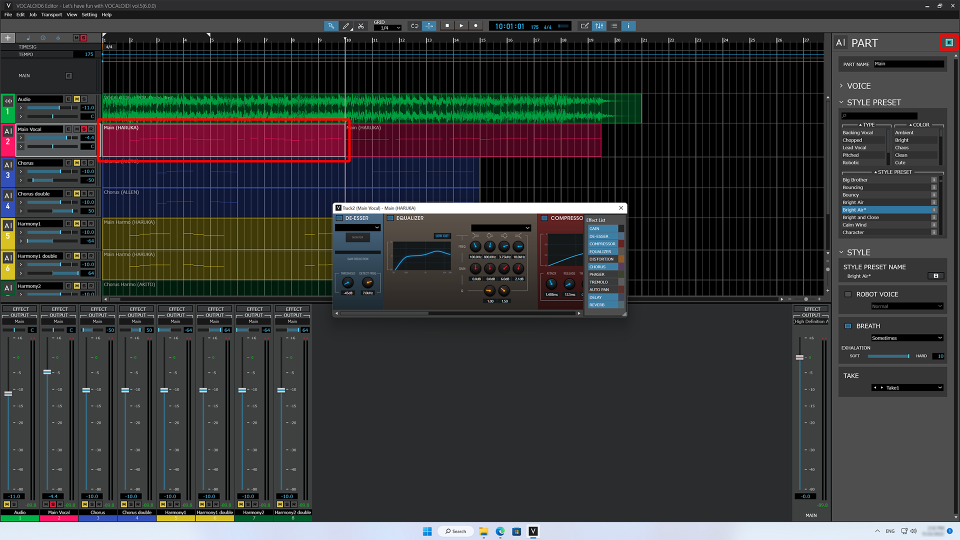
This opens a window where effects can be adjusted for the part. The effects are shown in the window. Multiple effects are in use.
Slide right to show the REVERB and DELAY effects.

Change the DRY/WET parameters of these effects to 10%. The DRY/WET parameter adjusts the amount of the effect. Then, let's play it.
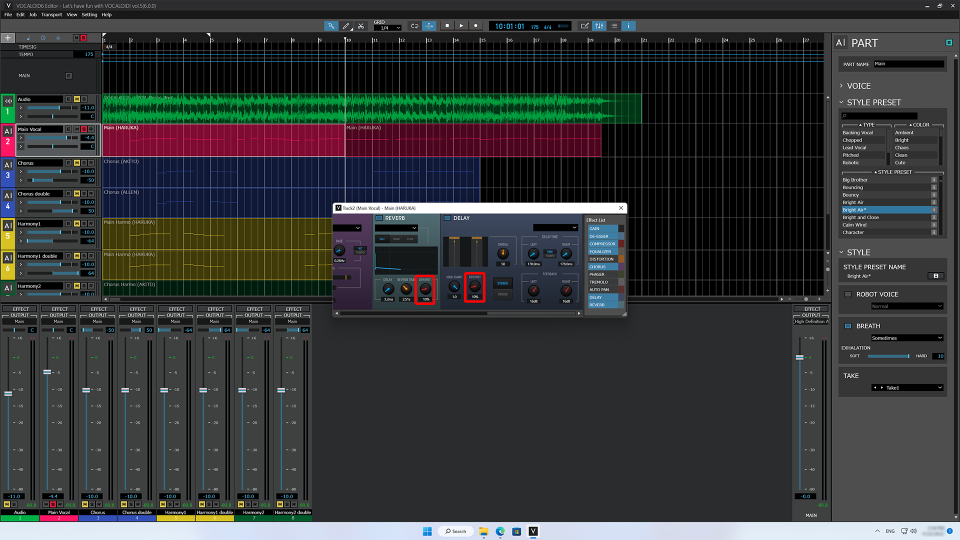
The effects have been reduced.
In effects, “WET” is the effect sound and “DRY” is the sound without the effect. Some effects also use “DEPTH” for the amount.
Style preset effects are applied separately to each part. So, let’s set the WET/DRY parameters to 10% for the REVERB and DELAY of the second part in the same way.
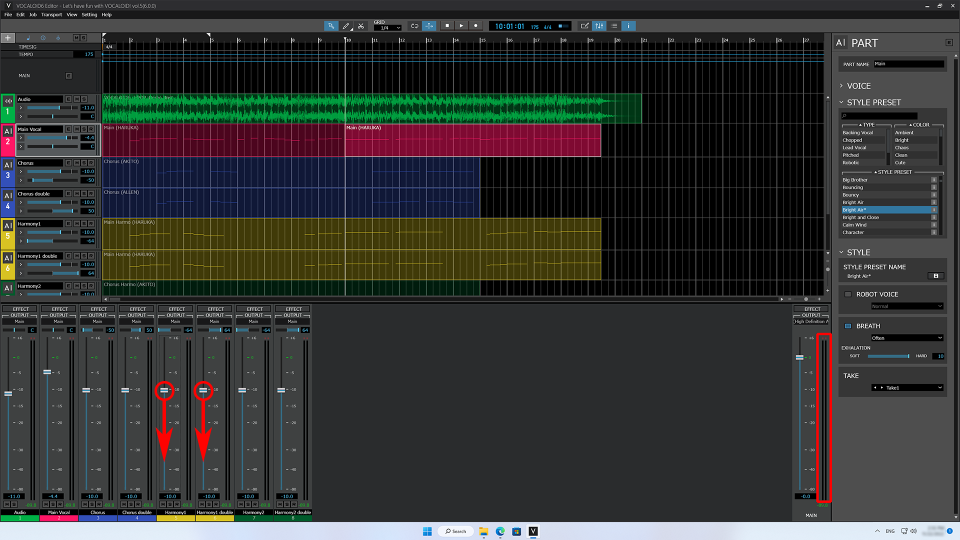
Let’s stop soloing and listen to it from the beginning. During playback listen and make sure that the master meters do not go in to the red.
With less reverb, the vocal stands out more. By adjusting breath and reverb, we have made the vocal stand out more, creating a nicer sound.
The meters looked fine, but the harmonies were loud, so let’s change the volumes of “Harmony” and “Harmony 1 double” to −15. Let’s play it again after changes the volumes.
We are almost done. Let’s check anything that bothers us while we listen.
The balance has become very good. We are done!
Making a file of the completed song
Right now, the music we have made cannot be heard without VOCALOID6 Editor. In order to have more people hear it, we are going to create an ordinary audio file that anyone can listen to.
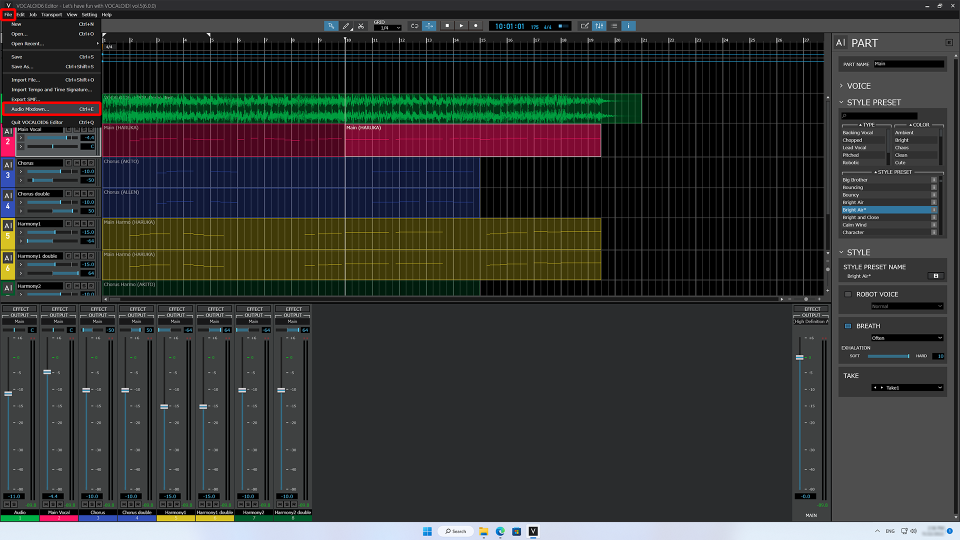
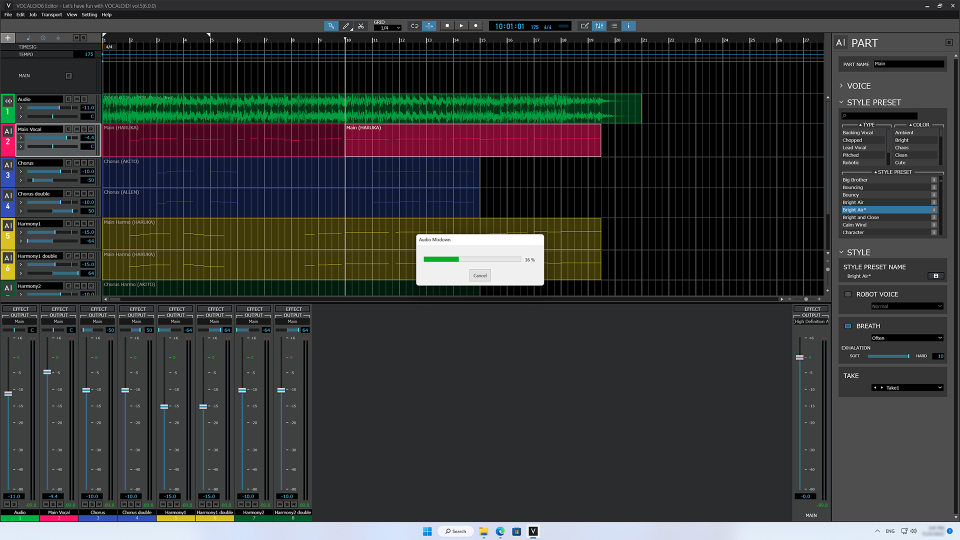
From the File menu, select “Audio Mixdown…”
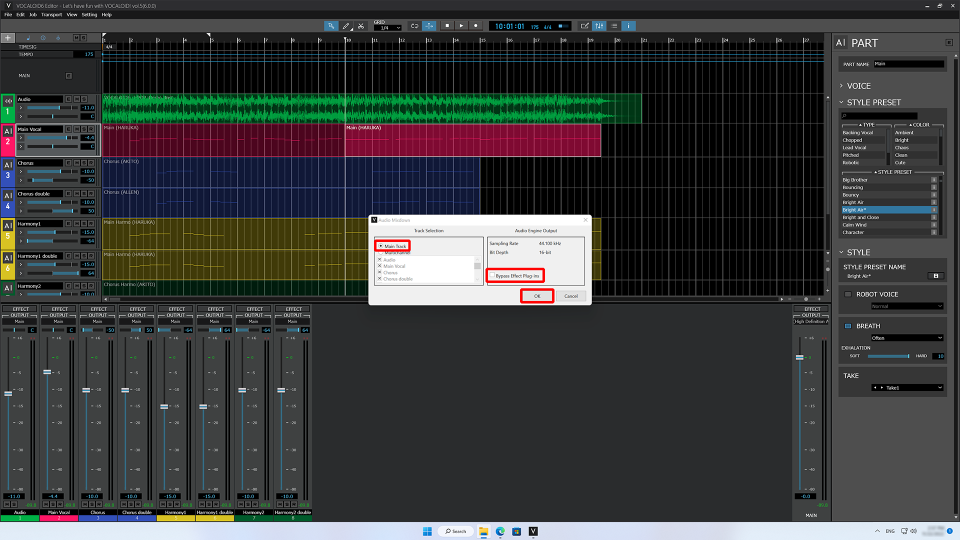
This opens the audio mixdown window. Under Track Selection, select “Main Track”. Under Audio Engine Output, confirm that “Bypass Effect Plug-ins” is unchecked. Then, select “OK”.
This opens the save destination. Choose the location and set the file name as desired. Then, select “Save”. I want to name the file “VOCALOID6-J-POP-fixed”.

VOCALOID6 Editor will export the file.
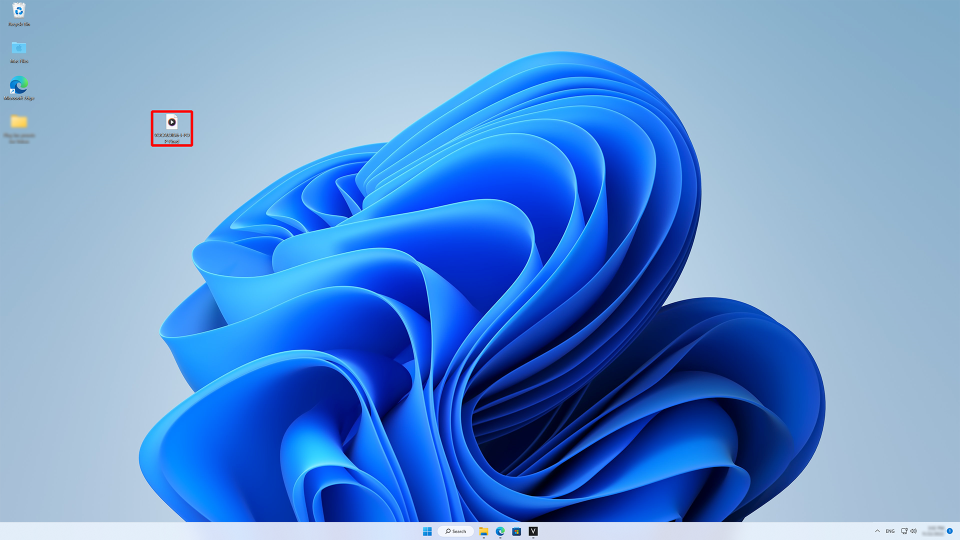
After it completes, we can check the specified save destination. We should find the exported file there. This file, which is in WAV format and is called a “WAV file”, can be played back on computers and smartphones.
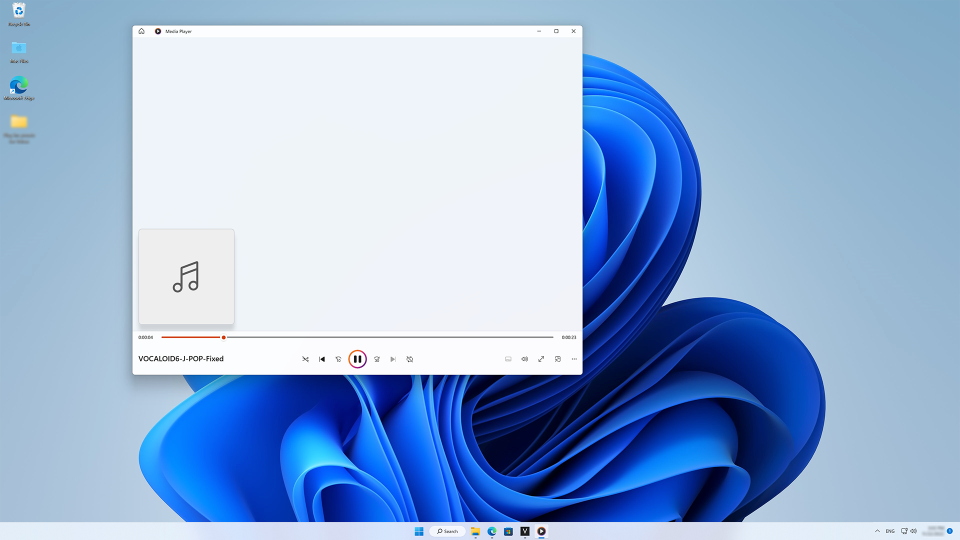
Let’s double click it to play it back.
It played back in the Groove Music app, which is standard in Windows.
Completed WAV files can also be imported into video editing applications. You can add video as you like and upload it to YouTube, for example, as you enjoy making VOCALOID music.
Thank you for reading!
We tried using VOCALOID over six parts. I hope you enjoyed it. Composition is difficult, but it is relatively easy to have fun covering existing songs and creating singing parts for them. Please try using VOCALOID6.
In these six parts, you should have learned the key operations of VOCALOID6 Editor, so why not try starting by having VOCALOID sing a song that you like.
I am looking forward to hearing the works that you make with VOCALOID. Thank you very much for watching. Please keep being a part of the VOCALOID community.